

[Update on January 26, 2017 – Added info about the Dutch Ovens we use to the recipe below. We typically either use a 4 qt round Staub Cocotte or a 5.75 oval Staub Dutch Oven. Any Dutch Oven with a lid within those sizes will do.]
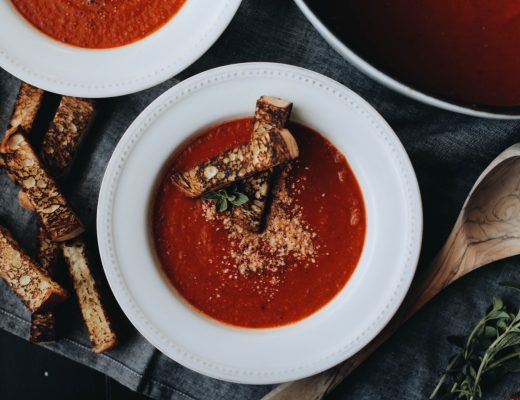
I have been making this no knead country white bread so often over the past year that it’s almost become habit. By the time 6pm rolls around on a Friday evening, Jane and I are already grabbing the mixing bowl and flour so that we can bake fresh bread on Saturday morning. By mid Saturday morning, the house is filled with that warm, comforting aroma of baked bread and we’re jumping at the chance to serve it up toasted with a little butter and jam. Sometimes we make two loaves so we can have bread for the next few days.
With all the rewards that come from baking fresh bread at home, the best part may be just how easy it is to make. You spend so little time mixing together the ingredients that it’s hardly considered work and the large majority of time spent is the time simply waiting for it rise and bake. I bet you spend no more than 10 total minutes mixing the ingredients and working with the dough, and if you time everything right, you spend most of its rise asleep during the night.
That being said, before I started making it regularly, I always figured there was a trick or something I was missing. Bread didn’t seem hard but I just assumed it wasn’t easy either. I was always unsure of how exact I needed to be with the rise or how it was mixed. I didn’t want to over-knead or fold too many times. Then I watched the video with Mark Bittman from the New York Times and my confidence grew a bit. I mean, they’re just throwing the ingredients together and dumping the dough into the dutch oven. It barely looks like they’re even measuring! I had to try it and I’m glad I did.
It was success at first try and boy was I proud of myself. Probably more than I should’ve been considering that people have been making bread for over 10,000 years. Nonetheless, I was still pretty excited. You could even hear the crust crackling straight from the oven. It was the crusty, rustic country bread I’ve always dreamed of making. Earthy flavor on the outside, buttery and spongy on the inside. At that point, I just felt foolish for over-complicating it in my mind and stalling for so long.
Since then, we’ve made it countless of times and tweaked it a bit here and there with herbs or spices to play with the taste. We’ve also learned the many ways an oven or weather can affect how it bakes or rises. Flour can come into play as well. All Purpose works fine but I find that Bread Flour works better. It rises a bit more and the texture is more satisfying. My point here is that you shouldn’t be afraid to add in a little fresh thyme and cracked black pepper. It’s hard to mess this recipe up as long as you stick to all purpose or bread flour. Other flours take water differently and it’s a whole other story for another day.
With that in mind, we wanted to provide a walkthrough of how we make use of this recipe for our readers. We always receive a lot of requests for the recipe whenever we post a photo of our bread on Instagram and we thought it was time to provide a visual guide to show how easy it is.


You could certainly mix with a wooden spoon but I prefer to do so by hand. It allows you to get a better feel for the mix as everything combines. Plus, you don’t want to over work the dough. Nature does most of the work for you. Depending on the flour, your kitchen temperature, and probably other environment factors I don’t know enough about to say, the dough may vary in how wet or dry it feels or appears. Just roll with it. It will work out in the end.
The reason I use honey in the water is two-fold. It adds a little sweetness but not too much and it tends to make the crust a little flakier. That’s certainly something I couldn’t prove with science or anything, just experience.


Look at the rough, oblong shape of the dough in the first photo (top left). This is just after it’s scraped from the bowl onto the floured work surface. When the recipe instructs you to fold the dough over itself, you take each end and pull it towards the middle, making a round shape. You will then flip that side to the bottom while it proofs and rises again. The folded side will then be the top again when you flip it out of the proofing basket but it’s the folds that create the cracks and ears on the surface of the crust.


The first of the above photos show the proofed bread just before you place it in the dutch oven. I love using a banneton (or proofing basket) for the beautiful lines it creates. You can find fairly inexpensive versions on Amazon.
The other photo just above is the bread after the first wave of baking (covered for 30 minutes). This is the size it will remain permanently. The next 25 minutes of uncovered baking will focus on the crust. You’ll want a dark brown color like the below photos. I’ve made bread with this recipe at least two dozen times and it pretty much comes out like the following photos every time.


at the NY Times
3 cups unbleached bread flour
(or all purpose)
1 1/4 tsp salt
1/4 tsp dried yeast
1 tbsp of honey
1 5/8 cup (380 ml) water
1 tbsp of course corn meal
We typically either use a 4 qt round Staub Cocotte
or a 5.75 oval Staub Dutch Oven. Any Dutch Oven
with a lid of those sizes will do.
In a large mixing bowl, add all the dry ingredients and stir together using your hand. In a measuring cup, add honey to the water and then slowly add that to the flour, mixing with your hand, until everything is combined and there is no loose flour. The dough will be sticky and look slightly wet. Cover with plastic wrap or a kitchen towel and place in a warm, dark spot for at least 12 hours but no more than 18 hours.
After 12-18 hours, the dough will have risen and the surface should look quite bubbly. Lightly dust your counter or work area with flour and place the dough on top of it. After sprinkling a bit more flour to the top of the dough, pull and fold it over itself. Flip the dough over and shape into a round ball. Place in a well flour bread basket or bowl for one hour covered to proof.
Preheat the oven to 475 F with the dutch oven or cooking vessel with lid inside as it heats. Allow this to continue heating for the entire one hour proofing process.
When the dough has proofed, remove the cooking vessel from the oven and set aside the lid. Sprinkle a little coarse corn meal to the bottom of the dutch oven to coat the bottom of the dough while baking. Flip the dough out of the basket/bowl onto a floured surface and then drop quickly into the cooking vessel. Cover and then place back into the over for 30 minutes.
After 30 minutes, remove the lid from the cooking vessel and allow the bread to cook for another 25-30 minutes. Remove when the bread is dark brown with a few charred spots and place the bread carefully on a cooling rack for 20-30 minutes.


12 Comments
Mary
January 24, 2017 at 2:48 pmYour bread looks delicious – what size Dutch oven are you using?
Jeff
January 26, 2017 at 2:32 pmWe use Staub, either a 4 qt round Cocotte or a 5.75 Dutch Oven. We also have an old 6 qt Dutch Oven from Ikea that works perfectly as well. Anything between the sizes should work just fine as long as they’re sturdy, oven safe, and come with a lid.
Charissa
March 28, 2017 at 2:17 amI made bread that came out super dark yesterday and I’d assumed I’d done it wrong! It’s interesting that you’re aiming for that colour.
Jeff
April 14, 2017 at 12:09 pmWe fell in love with the flavor of a slightly charred crust from a local bakery and started doing it that way at home.
Ana
February 8, 2018 at 10:15 amI haven’t been able to find coarse cornmeal where I live in Spain, any suggestions on how to substitute it? Or can I leave it out?
Jeff
February 8, 2018 at 10:24 amYou can definitely leave it out. It adds a little texture to the bottom and also creates a buffer between the bread and pan while cooking but it’s not required. I’ve made the bread several times without it.
Ana
February 9, 2018 at 5:37 pmThanks, Jeff! Can’t wait to try it!
Rick White
January 23, 2019 at 1:30 amMy Dutch ovens max temp is 450° Can I adapt the recipe ?
Jeff
January 28, 2019 at 6:08 pmI don’t recommend going below 450F for this recipe but I would personally be a little nervous about testing the max temp too. What brand/kind of dutch oven?
John Galletta
January 23, 2020 at 10:27 pmHi Rick,
The reason for the temperature limit may be your dutch oven lid’s handle. I’ve heard of places that sell inexpensive replacements for use at higher temperatures which may be worth looking into. Check and see if this is the reason for the temperature limit. If not, it may be best to get a different dutch oven.
-John
Aurélie
April 11, 2020 at 6:41 pmHi Jeff and Jane! I tried your recipe and the result was great! I just put 1 teaspoon of yeast and 30g of sourdough starter (“levain”). Last week, I was doing my own levain using rye flour and water for the first time. It didn’t rise enough I think that’s why and I combined both.
Thank you for your hard work and your PDF, I’m sure this is a lot of work!
Have a great night and take care!
Warmly,
Aurelie
Jeff
April 14, 2020 at 2:47 pmThank you so much, Aurelie! Appreciate the note and congrats on the levain!